RainbowDuino here it is! (and how to program it)
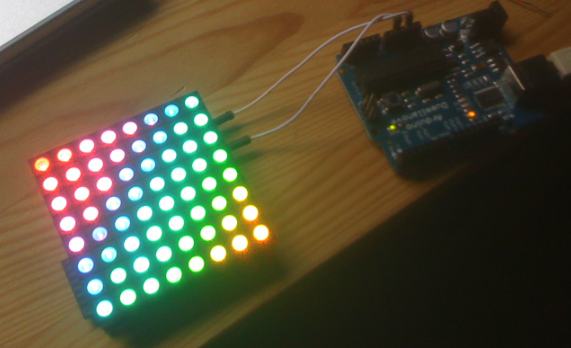
Yay - I finally got my RainbowDuino. Unluckily I did sth wrong with the external power connection (JST 2 pin jack) and smashed a capacitor. Maybe the polarity was wrong or it couldn’t stand the 12 volts? But luckily no damage to the main system so it still works using the terminal connector (right through the 5volts of the Arduino). *phew*
The first real basic problem I ran into was how to program the Rainbowduino as there’s no USB connector and I don’t have an UART interface.
But well, nothing simpler than that: Just connect your Arduino’s Tx,Rx,GND,Reset and Vcc ports with those of the Rainbowduino, choose the right controller type in your IDE and program it as usual - works perfect for me!
Check out my Rainbowduino Editor mtXcontrol here - it’s an easy way to draw shapes on your rainbowduino!
Btw. DTR on Rainbowduino is Reset on Arduino
UPDATE:
Sorry I forgot to mention, this trick does NOT work if your host arduino is a ATmega168 - you need an ATmega328 to pass serial communication through. Before that, make sure you upload this blank sketch to your host Arduino first:
[code]
/* blank sketch to upload on Arduino */
void setup()
{
}
void loop()
{
}
[/code]
And, as multiple times requested, a picture of my complete setup:
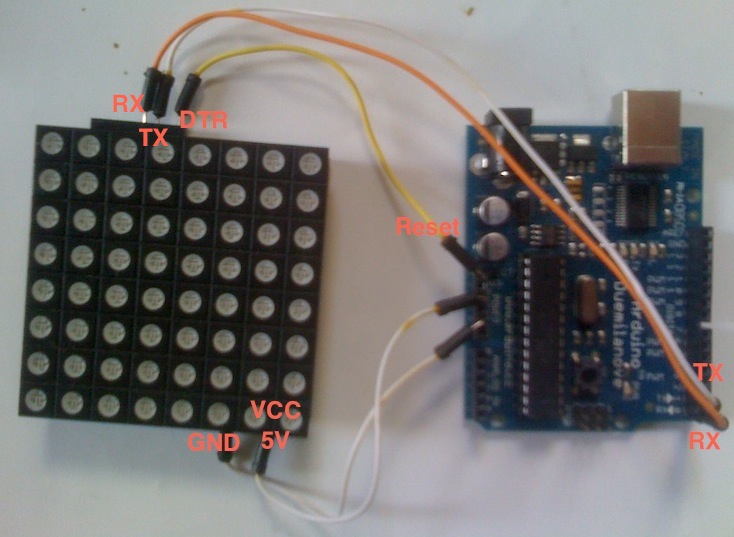
Make sure you’ve selected the switch right. It has to point to the same side as the green Terminal connectors are. If you power rainbowduino through the white JST jack, flip it!